2015年3月27日 星期五

RaspBerryPi-運用 Python 操控 GPIO

首先 Terminal 下
sudo apt-get install python-rpi.gpio

之前有介紹過有兩種執行方式
為了加速時間,就先捨去第一方法
直接使用第二種方法
1) sudo nano led.py
2)
import time, RPi.GPIO as GPIO
GPIO.setmode(GPIO.BCM);
GPIO.setup(4, GPIO.OUT);
while True:
    ledOn = GPIO.output(4,0);
    time.sleep(1);
    ledOff = GPIO.output(4,1);
    time.sleep(1);
3) ctrl + O
4) enter
5) python led.py


不知道各位大大是否有遇過以下的情形
RuntimeError : No access to /dev/mem. Try running as root!
原因是權限不足
無法更改操作硬體

6) sudo python led.py

歡迎轉載,請註明出處。


RaspBerryPi-基本 Python 使用

最近剛好有需求
所以利用時間來整理
樹莓派可以支援多個語言
但Python是最直接的
只需要文字編輯器!!!

確認Python步驟( 不要跳步驟 ) :

  1. sudo apt-get update( 更新系統安裝檔案 )
  2. sudo apt-get upgrade( 更新系統安裝檔案 )
  3. sudo apt-get install python2.7( 確認是否安裝 Python )


執行 Python 有兩種方式 :

1 . 直接在Termainl進入 Python 編輯模式寫程式
EX : 
1) python
2) print('Hello Python!');
Hello Python

雖然可以很快速地去執行,但如果是大量程式編寫。

2 . 透過文字編輯器編寫後執行
1) sudo nano hello.py
2)直接在裡面輸入 : print('Hello Python!');
3)Ctrl + O
4)Enter
5)Ctrl + X
6)Enter
7)python hello.py
Hello Python

看似非常的麻煩,但是在編寫的過程中較能掌握流程。

歡迎轉載,請註明出處。


2015年3月25日 星期三

Android-用 HttpURLConnection 取代 Parse SDK 查詢功能

更改日期 :
20150706 避免傳送中文造成的Exception

前幾天實作直接利用 HttpClient 取得資料回饋
但發現雖然都可以正常執行
但發現到這個要準備去棄用了
以下是官方的圖示


以下是連線到 Parse 並且取得資料
以下 ID 、 KEY 是連接Parse必給的參數
若沒需求可把附加的方法去除
以下是利用HttpURLConnection連線

public class TodoTask extends AsyncTask<Void,Void,String>{
    
    private String _api;
    private String _strJson;

    public TodoTask(String api, String strJson){
        this._api = api;
        this._strJson = strJson;
    }

    @Override
    public void onPreExecute() {
        super.onPreExecute();
    }

    @Override
    public String doInBackground(Void... arg0) {
        URL url;
        HttpURLConnection connection = null;  
        try {
            //Create connection
            url = new URL(_api);
            connection = (HttpURLConnection)url.openConnection();
            connection.setRequestMethod("POST");

            connection.setRequestProperty("Content-Type", "application/json");
            connection.setRequestProperty("Content-Length", "" + 
                Integer.toString(_strJson.getBytes().length));
            connection.setRequestProperty("Accept-Language", "en-US,en;q=0.5");

            connection.addRequestProperty("Application-Id","your project id");
            connection.addRequestProperty("API-Key","your project key");

            connection.setUseCaches (false);
            connection.setDoInput(true);
            connection.setDoOutput(true);

            connection.setConnectTimeout(5000);

            //Send request
            DataOutputStream wr = new DataOutputStream (connection.getOutputStream ());
            wr.write(_strJson.getBytes("utf-8"));
            wr.flush ();
            wr.close ();

            //Get Response    
            InputStream is = connection.getInputStream();
            BufferedReader rd = new BufferedReader(new InputStreamReader(is));
            String line;
            StringBuffer response = new StringBuffer(); 
            
            while((line = rd.readLine()) != null) {
                response.append(line);
                //response.append('\r');
            }
            rd.close();
            return response.toString();

        } catch (Exception e) {

            e.printStackTrace();
            return null;

        } finally {

            if(connection != null) {
                connection.disconnect(); 
            }
        }
    }

    @Override
    public void onPostExecute(String result) {
        super.onPostExecute(result);
        Log.d("tagg","onPostExecute : "+result);
        if(result != null && !"".equals(result)){
            
        }
    }
}


參考來源 : 來源

歡迎轉載,請註明出處。

Android-JSON 拆解使用介紹

更改日期 :
20150707_新增JSON字串_更改排版
20150812_新增 JSON.jar 路徑

如果要在一般 JavaProject 底下生成
必定要下載 Jar

以下是寫成JSON的字串,予以下範例無關

String json = "{\"key\":\"123456789\"}"

相信各位大大一定都在用GSON
不僅方便易懂,效率更高
但還是要回歸原本
多多少少一定要了解要如何使用JSON

try {
    
    // 1 . New 一個JSON物件,並把字串帶入
    JSONObject json = new JSONObject(result);
    
    // 2 . 接下來像剝洋蔥般的拆解參數
    Log.d("tag","onpost line : "+json.get("result"));
    String s = json.get("result").toString();
    
    // 
    JSONObject json1 = new JSONObject(s);
    Log.d("tag","onpost line : "+json1.get("code"));
    
    // 
    JSONObject json2 = new JSONObject(s);
    Log.d("tag","onpost line : "+json2.get("data"));
    
    // 3 . 陣列參數
    JSONArray nameList = json2.getJSONArray("data");
    int length = nameList.length(); 
    String aa = "";  
    for(int i = 0; i < length; i++)
    { 
        Log.d("debugTest",Integer.toString(i));  
        JSONObject oj = nameList.getJSONObject(i);  
        aa = aa + oj.getString("DESCRIPTION")+"|";  
        Log.d("tag","---onpost line : "+oj.getString("DESCRIPTION"));
        printMessage(oj.getString("DESCRIPTION"));
    }

} catch (JSONException e) {
    e.printStackTrace();
}


歡迎轉載,請註明出處。

Android-用HttpClient 取代 Parse SDK 查詢功能

Use HttpClient can  repaly Parse SDK inquire function
如果只要連到Parse取得資料還要裝SDK?
SDK程序太複雜( 基本上是不會的 )?
現在只要用簡單的方法就可以取得資料

public class Task extends AsyncTask<Void,Void,String>{
        private String url;
        private String applicationID;
        private String clientKey;
        private List<NameValuePair> list;
        
        public Task(String url, String applicationID, 
                String clientKey, List<NameValuePair> list) {
            this.url = url;
            this.applicationID = applicationID;
            this.clientKey = clientKey;
            this.list = list;
        }

        @Override
        public void onPreExecute() {
            super.onPreExecute();
        }

        @Override
        public String doInBackground(Void... arg0) {
            String result = null;
            try {
                HttpClient httpClient = new DefaultHttpClient();
                HttpPost post = new HttpPost(url);

                post.setHeader("X-Parse-Application-Id", applicationID);
                post.setHeader("X-Parse-REST-API-Key", clientKey);

                post.setEntity(new UrlEncodedFormEntity(list));

                HttpResponse response = httpClient.execute(post);

                BufferedReader rd = new BufferedReader(
                        new InputStreamReader(response.getEntity().getContent()));
                String line;
                StringBuffer responseBuffer = new StringBuffer();
                while ((line = rd.readLine()) != null) {
                    responseBuffer.append(line);
                }
                rd.close();
                result = responseBuffer.toString();
                
            } catch (IOException e) {
                e.printStackTrace();
            }
            return result;
        }

        @Override
        public void onPostExecute(String result) {
            super.onPostExecute(result);
        }
    }

調用方法
        List<NameValuePair> parameters = new ArrayList<NameValuePair>();
        parameters.add(new BasicNameValuePair("name", "JJ"));
        parameters.add(new BasicNameValuePair("Address", "US"));        
        
        Connection connectioni = new Connection();
        new Task("https://api.parse.com/functions/query85481", 
                "Application-ID", 
                "API-Key", 
                parameters).execute();

 歡迎轉載,請註明出處。

2015年3月23日 星期一

Android-搜尋 Bluetooth Low Energy 頁面

整理出一份
MainActivity.java
package com.lightblue.bluetooth_socket;

import android.app.Activity;
import android.bluetooth.BluetoothAdapter;
import android.bluetooth.BluetoothDevice;
import android.content.Intent;
import android.os.Bundle;
import android.util.Log;
import android.view.View;
import android.view.View.OnClickListener;
import android.widget.Button;
import android.widget.TextView;
import android.widget.Toast;

public class MainActivity extends Activity implements OnClickListener{

    private static final int REQUEST_SELECT_DEVICE = 1;
    private static final int REQUEST_ENABLE_BT = 2;
    private BluetoothDevice mDevice = null;
    private BluetoothAdapter mBtAdapter = null;

    private Button btnConnectBlueTooth; 
    private TextView textBlueName;
    private TextView textBlueMac;

    @Override
    protected void onCreate(Bundle savedInstanceState) {
        super.onCreate(savedInstanceState);
        setContentView(R.layout.activity_main);

        mBtAdapter = BluetoothAdapter.getDefaultAdapter();
        if (mBtAdapter == null) {
            Toast.makeText(this, "Bluetooth is not available", Toast.LENGTH_LONG).show();
            finish();
            return;
        }

        btnConnectBlueTooth = (Button) findViewById(R.id.connectBlueToothBtn);
        textBlueName = (TextView) findViewById(R.id.bluetoothNameTextView);
        textBlueMac = (TextView) findViewById(R.id.bluetoothMacTextView);

        btnConnectBlueTooth.setOnClickListener(this);

    }

    @Override
    public void onResume() {
        super.onResume();
        if (!mBtAdapter.isEnabled()) {
            Intent enableIntent = new Intent(BluetoothAdapter.ACTION_REQUEST_ENABLE);
            startActivityForResult(enableIntent, REQUEST_ENABLE_BT);
        }
    }

    @Override
    public void onActivityResult(int requestCode, int resultCode, Intent data) {
        Log.d("BLE","requestCode : "+requestCode);
        switch (requestCode) {

        case REQUEST_SELECT_DEVICE:
            if (resultCode == Activity.RESULT_OK && data != null) {
                String deviceAddress = data.getStringExtra(BluetoothDevice.EXTRA_DEVICE);
                mDevice = BluetoothAdapter.getDefaultAdapter().getRemoteDevice(deviceAddress);
                textBlueName.setText("Bluetooth : "+mDevice.getName());
                textBlueMac.setText("Bluetooth Address : "+mDevice.getAddress());
            }
            break;
        case REQUEST_ENABLE_BT:
            if (resultCode == Activity.RESULT_OK) {
                Toast.makeText(this, "Bluetooth has turned on ", Toast.LENGTH_SHORT).show();

            } else {
                Toast.makeText(this, "Problem in BT Turning ON ", Toast.LENGTH_SHORT).show();
                finish();
            }
            break;
        default:
            break;
        }
    }

    @Override
    public void onClick(View view) {

        switch(view.getId()){
        case R.id.connectBlueToothBtn:
            Intent newIntent = new Intent(MainActivity.this, DeviceListActivity.class);
            startActivityForResult(newIntent, REQUEST_SELECT_DEVICE);
            break;
        }
    }
}


DeviceListActivity.java
public class DeviceListActivity extends Activity {
    private BluetoothAdapter mBluetoothAdapter;

   // private BluetoothAdapter mBtAdapter;
    private TextView mEmptyList;
    public static final String TAG = "DeviceListActivity";
    
    List<BluetoothDevice> deviceList;
    private DeviceAdapter deviceAdapter;
    private ServiceConnection onService = null;
    Map<String, Integer> devRssiValues;
    private static final long SCAN_PERIOD = 10000; //10 seconds
    private Handler mHandler;
    private boolean mScanning;

    @Override
    protected void onCreate(Bundle savedInstanceState) {
        
        super.onCreate(savedInstanceState);
        Log.d(TAG, "onCreate");
        getWindow().setFeatureInt(Window.FEATURE_CUSTOM_TITLE, R.layout.title_bar);
        setContentView(R.layout.device_list);
        android.view.WindowManager.LayoutParams layoutParams = this.getWindow().getAttributes();
        layoutParams.gravity=Gravity.TOP;
        layoutParams.y = 200;
        mHandler = new Handler();
        // Use this check to determine whether BLE is supported on the device.  Then you can
        // selectively disable BLE-related features.
        if (!getPackageManager().hasSystemFeature(PackageManager.FEATURE_BLUETOOTH_LE)) {
            Toast.makeText(this, "不支援BLE裝置", Toast.LENGTH_SHORT).show();
            finish();
        }

        // Initializes a Bluetooth adapter.  For API level 18 and above, get a reference to
        // BluetoothAdapter through BluetoothManager.
        final BluetoothManager bluetoothManager =
                (BluetoothManager) getSystemService(Context.BLUETOOTH_SERVICE);
        mBluetoothAdapter = bluetoothManager.getAdapter();

        // Checks if Bluetooth is supported on the device.
        if (mBluetoothAdapter == null) {
            Toast.makeText(this, "不支援BLE裝置", Toast.LENGTH_SHORT).show();
            finish();
            return;
        }
        populateList();
        mEmptyList = (TextView) findViewById(R.id.empty);
        Button cancelButton = (Button) findViewById(R.id.btn_cancel);
        cancelButton.setOnClickListener(new OnClickListener() {
            @Override
            public void onClick(View v) {
                
                if (mScanning==false) scanLeDevice(true); 
                else finish();
            }
        });

    }

    private void populateList() {
        /* Initialize device list container */
        Log.d(TAG, "populateList");
        deviceList = new ArrayList<BluetoothDevice>();
        deviceAdapter = new DeviceAdapter(this, deviceList);
        devRssiValues = new HashMap<String, Integer>();

        ListView newDevicesListView = (ListView) findViewById(R.id.new_devices);
        newDevicesListView.setAdapter(deviceAdapter);
        newDevicesListView.setOnItemClickListener(mDeviceClickListener);

           scanLeDevice(true);

    }
    
    private void scanLeDevice(final boolean enable) {
        final Button cancelButton = (Button) findViewById(R.id.btn_cancel);
        if (enable) {
            // Stops scanning after a pre-defined scan period.
            mHandler.postDelayed(new Runnable() {
                @Override
                public void run() {
                    mScanning = false;
                    mBluetoothAdapter.stopLeScan(mLeScanCallback);                      
                    cancelButton.setText("掃描");

                }
            }, SCAN_PERIOD);

            mScanning = true;
            mBluetoothAdapter.startLeScan(mLeScanCallback);
            cancelButton.setText("取消");
        } else {
            mScanning = false;
            mBluetoothAdapter.stopLeScan(mLeScanCallback);
            cancelButton.setText("掃描");
        }

    }

    private BluetoothAdapter.LeScanCallback mLeScanCallback =
            new BluetoothAdapter.LeScanCallback() {

        @Override
        public void onLeScan(final BluetoothDevice device, final int rssi, byte[] scanRecord) {
            runOnUiThread(new Runnable() {
                @Override
                public void run() {
                    
                      runOnUiThread(new Runnable() {
                          @Override
                          public void run() {
                              addDevice(device,rssi);
                          }
                      });                  
                }
            });
        }
    };
    
    private void addDevice(BluetoothDevice device, int rssi) {
        boolean deviceFound = false;

        for (BluetoothDevice listDev : deviceList) {
            if (listDev.getAddress().equals(device.getAddress())) {
                deviceFound = true;
                break;
            }
        }
   
        devRssiValues.put(device.getAddress(), rssi);
        if (!deviceFound) {
            deviceList.add(device);
            mEmptyList.setVisibility(View.GONE);          
            deviceAdapter.notifyDataSetChanged();
        }
    }

    @Override
    public void onStart() {
        super.onStart();
       
        IntentFilter filter = new IntentFilter(BluetoothDevice.ACTION_FOUND);
        filter.addAction(BluetoothAdapter.ACTION_DISCOVERY_FINISHED);
        filter.addAction(BluetoothAdapter.ACTION_STATE_CHANGED);
    }

    @Override
    public void onStop() {
        super.onStop();
        mBluetoothAdapter.stopLeScan(mLeScanCallback);
    
    }

    @Override
    protected void onDestroy() {
        super.onDestroy();
        mBluetoothAdapter.stopLeScan(mLeScanCallback);
        
    }

    private OnItemClickListener mDeviceClickListener = new OnItemClickListener() {
        
        @Override
        public void onItemClick(AdapterView<?> parent, View view, int position, long id) {
            BluetoothDevice device = deviceList.get(position);
            mBluetoothAdapter.stopLeScan(mLeScanCallback);
  
            Bundle b = new Bundle();
            b.putString(BluetoothDevice.EXTRA_DEVICE, deviceList.get(position).getAddress());

            Intent result = new Intent();
            result.putExtras(b);
            setResult(Activity.RESULT_OK, result);
            finish();
            
        }
    };
    
    protected void onPause() {
        super.onPause();
        scanLeDevice(false);
    }
    
    class DeviceAdapter extends BaseAdapter {
        Context context;
        List<BluetoothDevice> devices;
        LayoutInflater inflater;

        public DeviceAdapter(Context context, List<BluetoothDevice> devices) {
            this.context = context;
            inflater = LayoutInflater.from(context);
            this.devices = devices;
        }

        @Override
        public int getCount() {
            return devices.size();
        }

        @Override
        public Object getItem(int position) {
            return devices.get(position);
        }

        @Override
        public long getItemId(int position) {
            return position;
        }

        @Override
        public View getView(int position, View convertView, ViewGroup parent) {
            ViewGroup vg;

            if (convertView != null) {
                vg = (ViewGroup) convertView;
            } else {
                vg = (ViewGroup) inflater.inflate(R.layout.device_element, null);
            }

            BluetoothDevice device = devices.get(position);
            final TextView tvadd = ((TextView) vg.findViewById(R.id.address));
            final TextView tvname = ((TextView) vg.findViewById(R.id.name));
            final TextView tvpaired = (TextView) vg.findViewById(R.id.paired);
            final TextView tvrssi = (TextView) vg.findViewById(R.id.rssi);

            tvrssi.setVisibility(View.VISIBLE);
            byte rssival = (byte) devRssiValues.get(device.getAddress()).intValue();
            if (rssival != 0) {
                tvrssi.setText("Rssi = " + String.valueOf(rssival));
            }

            tvname.setText(device.getName());
            tvadd.setText(device.getAddress());
            if (device.getBondState() == BluetoothDevice.BOND_BONDED) {
                Log.i(TAG, "device::"+device.getName());
                tvname.setTextColor(Color.BLACK);
                tvadd.setTextColor(Color.BLACK);
                tvpaired.setTextColor(Color.GRAY);
                tvpaired.setVisibility(View.VISIBLE);
                tvpaired.setText("paired");
                tvrssi.setVisibility(View.VISIBLE);
                tvrssi.setTextColor(Color.BLACK);
                
            } else {
                tvname.setTextColor(Color.BLACK);
                tvadd.setTextColor(Color.BLACK);
                tvpaired.setVisibility(View.GONE);
                tvrssi.setVisibility(View.VISIBLE);
                tvrssi.setTextColor(Color.BLACK);
            }
            return vg;
        }
    }
}


activity_main.xml
<LinearLayout xmlns:android="http://schemas.android.com/apk/res/android"
    xmlns:tools="http://schemas.android.com/tools"
    android:id="@+id/LinearLayout1"
    android:layout_width="match_parent"
    android:layout_height="match_parent"
    android:orientation="vertical" >

    <Button
        android:id="@+id/connectBlueToothBtn"
        android:layout_width="match_parent"
        android:layout_height="wrap_content"
        android:text="ConnectBluetooth" />

    <TextView
        android:id="@+id/bluetoothNameTextView"
        android:layout_width="wrap_content"
        android:layout_height="wrap_content"
        android:text="TextView" />

    <TextView
        android:id="@+id/bluetoothMacTextView"
        android:layout_width="wrap_content"
        android:layout_height="wrap_content"
        android:text="TextView" />

</LinearLayout>


device_element.xml
<?xml version="1.0" encoding="utf-8"?>
<RelativeLayout xmlns:android="http://schemas.android.com/apk/res/android"
    android:layout_width="wrap_content"
    android:layout_height="wrap_content"
    android:orientation="vertical"
    android:padding="6dp" 
    android:textColor="#FF000000"
    >

    <TextView
        android:id="@+id/paired"
        android:layout_width="wrap_content"
        android:layout_height="wrap_content"
        android:layout_alignParentRight="true"
        android:layout_alignParentBottom="true"
        android:text="paired"
        android:textSize="12dp" />

    <TextView
        android:id="@+id/rssi"
        android:layout_width="wrap_content"
        android:layout_height="wrap_content"
        android:layout_alignParentRight="true"
        android:layout_alignParentTop="true"
        android:layout_below="@+id/paired"
        android:textSize="12dp" />

    <TextView
        android:id="@+id/name"
        android:layout_width="wrap_content"
        android:layout_height="wrap_content"
        android:layout_alignParentLeft="true"
        android:textSize="14dp" />

    <TextView
        android:id="@+id/address"
        android:layout_width="wrap_content"
        android:layout_height="wrap_content"
        android:layout_below="@+id/name"
        android:textSize="10dp" />

</RelativeLayout>

device_list.xml
<?xml version="1.0" encoding="utf-8"?>

<LinearLayout xmlns:android="http://schemas.android.com/apk/res/android"
    android:layout_width="fill_parent"
    android:layout_height="fill_parent"
    android:orientation="vertical" >

    <RelativeLayout
        android:layout_width="fill_parent"
        android:layout_height="wrap_content"
        android:background="#666" >

        <TextView
            android:id="@+id/title_devices"
            android:layout_width="wrap_content"
            android:layout_height="wrap_content"
            android:layout_centerInParent="true"
            android:paddingLeft="12dp"
            android:paddingRight="50dp"
            android:text="選擇裝置"
            android:textColor="#fff"
            android:textSize="15dip" />

        <ImageView
            android:id="@+id/about"
            android:layout_width="wrap_content"
            android:layout_height="wrap_content"
            android:layout_alignParentRight="true"
            android:layout_centerVertical="true"
            android:src="@android:drawable/ic_menu_info_details" />
    </RelativeLayout>
    <LinearLayout android:layout_width="fill_parent"
        android:layout_height="fill_parent"
        android:orientation="vertical" >
        <ListView
            android:id="@+id/new_devices"
            android:layout_width="fill_parent"
            android:layout_height="fill_parent"
            android:layout_weight="2"
            android:stackFromBottom="true" />

        <TextView
            android:id="@+id/empty"
            android:layout_width="wrap_content"
            android:layout_height="wrap_content"
            android:text="掃描" />

        <Button
            android:id="@+id/btn_cancel"
            android:layout_width="match_parent"
            android:layout_height="wrap_content"
            android:text="@android:string/cancel" />
    </LinearLayout>
</LinearLayout>

title_bar.xml
<LinearLayout xmlns:android="http://schemas.android.com/apk/res/android"
    android:layout_width="fill_parent"
    android:layout_height="fill_parent"
    android:orientation="vertical" >
    <TextView
            android:id="@+id/title_devices"
            android:layout_width="fill_parent"
            android:layout_height="fill_parent"
            android:text="@string/app_name">
    </TextView>
</LinearLayout>


歡迎轉載,請註明出處。

2015年3月19日 星期四

Android-更新 SDK 至 22 導致圖形面板設計例外

Update SDK 22 but has exception in Layout.XML

不知道那位大大有遇到以下狀況
圖形化拖曳設計界面突然出現例外

java.lang.NullPointerException
Exception details are logged in Window > Show View > Error Log
The following classes could not be instantiated:
- android.support.v7.internal.app.WindowDecorActionBar (Open Class, Show Error Log)
- android.support.v7.internal.widget.ActionBarContextView (Open Class, Show Error Log)
- android.support.v7.widget.Toolbar (Open Class, Show Error Log)
See the Error Log (Window > Show View) for more details.


沒錯,就以上的 Code。

就在手無寸鐵之際,出現一道曙光。


被這個玩了好久 OTZ

歡迎轉載,請註明出處。


2015年3月17日 星期二

Android-簡單倒數計時 CountDownTimer

其實網路上有很多倒數計時器的文章
其中一篇文章調用的方法真的超級簡單
以下是代碼 :

倒數30秒
new CountDownTimer(30000, 1000) {

     public void onTick(long millisUntilFinished) {
         if(isCanceled) cancel(); //如果要中斷
     }

     public void onFinish() {
         
     }
  }.start();

沒錯,就這幾行。

資料來源 : 惡補日記
資料來源 : 官方

歡迎轉載,請註明出處。

2015年3月16日 星期一

Android-美圖秀秀 APP_風格圖片( 二 )

同上一章節
其實外面的美圖工具是在參數設置上有很多的庫
簡單的說他們有很多實驗出來的參數
只要藉由格式工廠設置就變為你想要的風格
如下面常見到的樣式

MainActivity.java
public class MainActivity extends Activity implements OnClickListener{

    private ImageView imageView1;
    private ImageView imageView2;
    private Button btn1;
    private Button btn2;
    private Button btn3;
    private Button btn4;
    
    private Bitmap bitmap;
    
    @Override
    protected void onCreate(Bundle savedInstanceState) {
        super.onCreate(savedInstanceState);
        setContentView(R.layout.activity_main);
        
        imageView1 = (ImageView) findViewById(R.id.imageView1);
        imageView2 = (ImageView) findViewById(R.id.imageView2);
        btn1 = (Button) findViewById(R.id.button1);
        btn2 = (Button) findViewById(R.id.button2);
        btn3 = (Button) findViewById(R.id.button3);
        btn4 = (Button) findViewById(R.id.button4);
        
        btn1.setOnClickListener(this);
        btn2.setOnClickListener(this);
        btn3.setOnClickListener(this);
        btn4.setOnClickListener(this);
        
        bitmap = BitmapFactory.decodeResource(getResources(), R.drawable.pf);
        
        imageView1.setImageBitmap(bitmap);
        imageView2.setImageBitmap(bitmap);
        
    }

    @Override
    public void onClick(View view) {
        switch(view.getId()){
        case R.id.button1: // 原圖
            imageView2.setImageBitmap(bitmap);
            break;
        case R.id.button2: // 底片
            imageView2.setImageBitmap(ImageHelper.handleImageNegative(bitmap));
            break;
        case R.id.button3: // 懷舊
            imageView2.setImageBitmap(ImageHelper.handleImagePixelsOldPhoto(bitmap));
            break;
        case R.id.button4: // 浮雕
            imageView2.setImageBitmap(ImageHelper.handleImagePixelsRelief(bitmap));
            break;
        }
    }
}


ImageHelper.java
public class ImageHelper {

    public static Bitmap handleImageEffect(Bitmap bm, float hue, float saturation, float lum) {
        Bitmap bmp = Bitmap.createBitmap(bm.getWidth(), bm.getHeight(), Bitmap.Config.ARGB_8888);
        Canvas canvas = new Canvas(bmp);
        Paint paint = new Paint(Paint.ANTI_ALIAS_FLAG);

        ColorMatrix hueMatrix = new ColorMatrix();
        hueMatrix.setRotate(0, hue);
        hueMatrix.setRotate(1, hue);
        hueMatrix.setRotate(2, hue);

        ColorMatrix saturationMatrix = new ColorMatrix();
        saturationMatrix.setSaturation(saturation);

        ColorMatrix lumMatrix = new ColorMatrix();
        lumMatrix.setScale(lum, lum, lum, 1);

        ColorMatrix imageMatrix = new ColorMatrix();
        imageMatrix.postConcat(hueMatrix);
        imageMatrix.postConcat(saturationMatrix);
        imageMatrix.postConcat(lumMatrix);

        paint.setColorFilter(new ColorMatrixColorFilter(imageMatrix));
        canvas.drawBitmap(bm, 0, 0, paint);

        return bmp;
    }

    public static Bitmap handleImageNegative(Bitmap bm) {
        int width = bm.getWidth();
        int height = bm.getHeight();
        int color;
        int r, g, b, a;

        Bitmap bmp = Bitmap.createBitmap(width, height
                , Bitmap.Config.ARGB_8888);

        int[] oldPx = new int[width * height];
        int[] newPx = new int[width * height];
        bm.getPixels(oldPx, 0, width, 0, 0, width, height);

        for (int i = 0; i < width * height; i++) {
            color = oldPx[i];
            r = Color.red(color);
            g = Color.green(color);
            b = Color.blue(color);
            a = Color.alpha(color);

            r = 255 - r;
            g = 255 - g;
            b = 255 - b;

            if (r > 255) {
                r = 255;
            } else if (r < 0) {
                r = 0;
            }
            if (g > 255) {
                g = 255;
            } else if (g < 0) {
                g = 0;
            }
            if (b > 255) {
                b = 255;
            } else if (b < 0) {
                b = 0;
            }
            newPx[i] = Color.argb(a, r, g, b);
        }
        bmp.setPixels(newPx, 0, width, 0, 0, width, height);
        return bmp;
    }

    public static Bitmap handleImagePixelsOldPhoto(Bitmap bm) {
        Bitmap bmp = Bitmap.createBitmap(bm.getWidth(), bm.getHeight(),
                Bitmap.Config.ARGB_8888);
        int width = bm.getWidth();
        int height = bm.getHeight();
        int color = 0;
        int r, g, b, a, r1, g1, b1;

        int[] oldPx = new int[width * height];
        int[] newPx = new int[width * height];

        bm.getPixels(oldPx, 0, bm.getWidth(), 0, 0, width, height);
        for (int i = 0; i < width * height; i++) {
            color = oldPx[i];
            a = Color.alpha(color);
            r = Color.red(color);
            g = Color.green(color);
            b = Color.blue(color);

            r1 = (int) (0.393 * r + 0.769 * g + 0.189 * b);
            g1 = (int) (0.349 * r + 0.686 * g + 0.168 * b);
            b1 = (int) (0.272 * r + 0.534 * g + 0.131 * b);

            if (r1 > 255) {
                r1 = 255;
            }
            if (g1 > 255) {
                g1 = 255;
            }
            if (b1 > 255) {
                b1 = 255;
            }

            newPx[i] = Color.argb(a, r1, g1, b1);
        }
        bmp.setPixels(newPx, 0, width, 0, 0, width, height);
        return bmp;
    }

    public static Bitmap handleImagePixelsRelief(Bitmap bm) {
        Bitmap bmp = Bitmap.createBitmap(bm.getWidth(), bm.getHeight(),
                Bitmap.Config.ARGB_8888);
        int width = bm.getWidth();
        int height = bm.getHeight();
        int color = 0, colorBefore = 0;
        int a, r, g, b;
        int r1, g1, b1;

        int[] oldPx = new int[width * height];
        int[] newPx = new int[width * height];

        bm.getPixels(oldPx, 0, bm.getWidth(), 0, 0, width, height);
        for (int i = 1; i < width * height; i++) {
            colorBefore = oldPx[i - 1];
            a = Color.alpha(colorBefore);
            r = Color.red(colorBefore);
            g = Color.green(colorBefore);
            b = Color.blue(colorBefore);

            color = oldPx[i];
            r1 = Color.red(color);
            g1 = Color.green(color);
            b1 = Color.blue(color);

            r = (r - r1 + 127);
            g = (g - g1 + 127);
            b = (b - b1 + 127);
            if (r > 255) {
                r = 255;
            }
            if (g > 255) {
                g = 255;
            }
            if (b > 255) {
                b = 255;
            }
            newPx[i] = Color.argb(a, r, g, b);
        }
        bmp.setPixels(newPx, 0, width, 0, 0, width, height);
        return bmp;
    }
}

點擊復古風格按鈕


如果有仔細看程式碼
上面這幾個方法最大不同在於參數設置
只要知道你想要修改風格的參數算式
就可以打造出來了

歡迎轉載,請註明出處。

2015年3月15日 星期日

Android-美圖秀秀 APP_色相_飽和度_亮度( 一 )

以下圖片修改是我們在PS最常用的功能
這次我們藉由小小的範例來呈現商城或內建程式是怎執行的
這次資料來源來自於慕課網的教學範例
希望想進一步了解的大大們,可以善用。

藉由SeekBar調整圖片的色相、飽和度、亮度

MainActivity.java
package com.example.image;

import android.app.Activity;
import android.graphics.Bitmap;
import android.graphics.BitmapFactory;
import android.os.Bundle;
import android.widget.ImageView;
import android.widget.SeekBar;

public class MainActivity extends Activity implements SeekBar.OnSeekBarChangeListener{
    
    private ImageView mImageView;
    private SeekBar mSeekbarhue,mSeekbarSaturation, mSeekbarLum;
    private static int MAX_VALUE = 255;
    private static int MID_VALUE = 127;
    private float mHue,mStauration, mLum;
    private Bitmap bitmap;

    @Override
    protected void onCreate(Bundle savedInstanceState) {
        super.onCreate(savedInstanceState);
        setContentView(R.layout.activity_main);
        
        bitmap = BitmapFactory.decodeResource(getResources(), R.drawable.flower);
        
        mImageView = (ImageView) findViewById(R.id.imageView1);
        mSeekbarhue = (SeekBar) findViewById(R.id.seekBar1);
        mSeekbarSaturation = (SeekBar) findViewById(R.id.seekBar2);
        mSeekbarLum = (SeekBar) findViewById(R.id.seekBar3);
        
        mSeekbarhue.setOnSeekBarChangeListener(this);
        mSeekbarSaturation.setOnSeekBarChangeListener(this);
        mSeekbarLum.setOnSeekBarChangeListener(this);
        
        mSeekbarhue.setMax(MAX_VALUE);
        mSeekbarSaturation.setMax(MAX_VALUE);
        mSeekbarLum.setMax(MAX_VALUE);
        
        mSeekbarhue.setProgress(MID_VALUE);
        mSeekbarSaturation.setProgress(MID_VALUE);
        mSeekbarLum.setProgress(MID_VALUE);
        
        mImageView.setImageBitmap(bitmap);
        
    }

    @Override
    public void onProgressChanged(SeekBar seekBar, int progress,
            boolean fromUser) {
        switch(seekBar.getId()){
        case R.id.seekBar1:
            mHue = (progress-mHue)*1.0F / MID_VALUE*180;
            break;
        case R.id.seekBar2:
            mStauration = progress*1.0F / MID_VALUE;
            break;
        case R.id.seekBar3:
            mLum = progress*1.0F / MID_VALUE;
            break;
        }
        mImageView.setImageBitmap(ImageHelper.handleImageEffect(bitmap, mHue, mStauration, mLum));
        
    }

    @Override
    public void onStartTrackingTouch(SeekBar seekBar) {
        
    }

    @Override
    public void onStopTrackingTouch(SeekBar seekBar) {
        
    }

}


ImageHelper.java
public class ImageHelper {

    public static Bitmap handleImageEffect(Bitmap bm, float hue, float saturation, float lum) {
        
        // 由於不能直接修改,所以要複製一份
        Bitmap bmp = Bitmap.createBitmap(bm.getWidth(), bm.getHeight(), Bitmap.Config.ARGB_8888);
        Canvas canvas = new Canvas(bmp);
        Paint paint = new Paint(Paint.ANTI_ALIAS_FLAG);

        // 色調
        ColorMatrix hueMatrix = new ColorMatrix();
        hueMatrix.setRotate(0, hue);
        hueMatrix.setRotate(1, hue);
        hueMatrix.setRotate(2, hue);

        // 飽和度
        ColorMatrix saturationMatrix = new ColorMatrix();
        saturationMatrix.setSaturation(saturation);

        // 亮度
        ColorMatrix lumMatrix = new ColorMatrix();
        lumMatrix.setScale(lum, lum, lum, 1);

        ColorMatrix imageMatrix = new ColorMatrix();
        imageMatrix.postConcat(hueMatrix);
        imageMatrix.postConcat(saturationMatrix);
        imageMatrix.postConcat(lumMatrix);

        paint.setColorFilter(new ColorMatrixColorFilter(imageMatrix));
        canvas.drawBitmap(bm, 0, 0, paint);

        return bmp;
    }

}


原圖 :


亂調 :


歡迎轉載,請註明出處。


android-Failed to initialize Monitor Thread: Unable to establish loopback connection

不知道各位大大有沒遇到過以下的訊息 :


Connection with adb was interrupted.
0 attempts have been mde to reconnect.
You may want to manually restart adb from the Devices view.

發生狀況 :
模擬器能開啟卻無法載入
接手機到PC,Logcat有顯示訊息,但無法載入

解決方法 :
1 . 下命令提示字元 ( cmd )
2 . setx _JAVA_OPTIONS - Djava.new.preferIPv4Stack=true

目前看到所有的解法可以參考
1 . DDMS -> 硬體清單右上角( 倒三角 ) -> reset ADB

2 . cmd -> D: -> D:\Android_SDK\sdk\platform-tools
-> adb kill-server ->adb start-server

3 . 在 eclipse.ini 底下新增
openFile
-vmargs
-Djava.net.preferIPv4Stack=true 

4 . 關閉Window防火牆


參考資料 : 來源1( V )

I am afraid, it is not proxy. Nor the antivirus.
I had the same problem and neither helped.
But your Eclipse simply can't reach a site because java 7 by default
makes Eclpse to reach it throught the protocol IP6, that is not really supported by Eclipse,
at least in versions till 4.3.

Go to cmd,
use : setx _JAVA_OPTIONS -Djava.net.preferIPv4Stack=true


restart eclipse and it will work.
參考資料 : 來源2
參考資料 : 來源3
歡迎轉載,請註明出處。


Android-更新到SDK 22 遇到的問題

雖然有耳聞有出到Android 5.1
直到剛剛手癢來去更新 SDK 22
結果一開啟專案後全部都叉叉
內容為 :
This version of the rendering library is more recent than your version of ADT plug-in. 
Please update ADT plug-in .
沒錯,也要記得更新ADT


2015年3月12日 星期四

Android-藉由NDK JNI

Android-Eclipse install NDK 工具安裝

最近有需要安裝NDK在Eclipse的各位
目前找到最保險的方法
連結網址 : 連結在此

Native Devlipment Kit ( NDK )
讓開發者使用Android 的 C/C++原生語言 與 JAVA 一同使用
簡單的說,可以使用 C/C++的函式庫來解決Java所欠缺的運算效率

1 . Download the ADT Plugin zip file
2 . Start Eclipse, then select Help > Install New Software.
3 . Click Add, in the top-right corner.
4 . In the Add Repository dialog, click Archive.
5 . Select the downloaded ADT-23.0.4.zip file and click OK.
6 . Enter "ADT Plugin" for the name and click OK.
7 . In the Available Software dialog, select the checkbox next to Developer Tools and click Next.
8 . In the next window, you'll see a list of the tools to be downloaded. Click Next.
9 . Read and accept the license agreements, then click Finish.
10. If you get a security warning saying that the authenticity or validity of the software can't be established, click OK.
11. When the installation completes, restart Eclipse.

  1. 下載ADT最新Zip file
  2. 開啟 Eclipse 點選 Help -> InstallNew Software
  3. 點選右上角的Add
  4. 跳出對話視窗後點選Archive
  5. 選擇您剛剛下載完的ADT( 不用拆 ),點選 OK
  6. 點選ADT Plugin後點選OK
  7. 接下來就 Next 大法
  8. 重新開啟Eclipse
  9. 就出現NDK的選項了


歡迎轉載,請註明出處。

2015年3月10日 星期二

Android-播放串流影音( Play RTSP Vedio )( 二 )

之前有介紹過使用Vitamio第三方元件
雖然功能強大,但必須回歸到原生本質
這次要寫一個簡單的Sample
至於有沒有測試的連結,這可能要到Google 搜尋

RTSP是即時串流的協議
畫面會延遲有可能的原因 :
1 . 網路延遲
2 . 手機硬體規格
3 . 過多裝置連到監控裝置

話不多說,直接來看範例吧 !

activity_main.xml
<LinearLayout xmlns:android="http://schemas.android.com/apk/res/android"
    xmlns:tools="http://schemas.android.com/tools"
    android:id="@+id/LinearLayout1"
    android:layout_width="match_parent"
    android:layout_height="match_parent"
    android:orientation="vertical" >


    <EditText
        android:id="@+id/editText"
        android:layout_width="match_parent"
        android:layout_height="wrap_content"
        android:ems="10" >

        <requestFocus />
    </EditText>

    <Button
        android:id="@+id/playButton"
        android:layout_width="match_parent"
        android:layout_height="wrap_content"
        android:text="Play" />

    <VideoView
        android:id="@+id/rtspVideo"
        android:layout_width="match_parent"
        android:layout_height="wrap_content" />

</LinearLayout>


MainActivity.java
package com.example.rtsp;

import android.app.Activity;
import android.net.Uri;
import android.os.Bundle;
import android.view.View;
import android.view.View.OnClickListener;
import android.widget.Button;
import android.widget.EditText;
import android.widget.VideoView;

public class MainActivity extends Activity implements OnClickListener{

    EditText rtspUrl ;
    Button playButton ;  
    VideoView videoView ;  

    @Override  
    public void onCreate(Bundle savedInstanceState) {  
        super.onCreate(savedInstanceState);  
        setContentView(R.layout.activity_main);  

        rtspUrl = (EditText)this.findViewById(R.id.editText);  
        videoView = (VideoView)this.findViewById(R.id.rtspVideo); 
        playButton = (Button)this.findViewById(R.id.playButton);  
        playButton.setOnClickListener(this);

    }  

    @Override
    public void onClick(View view) {
        switch(view.getId()){
        case R.id.playButton:
            RtspStream(rtspUrl.getEditableText().toString());  
            break;
        }
    }  

    private void RtspStream(String rtspUrl){  
        videoView.setVideoURI(Uri.parse(rtspUrl));  
        videoView.requestFocus();  
        videoView.start();  
    }

}  

記得一定要新增權限 :

<uses-permission android:name="android.permission.INTERNET" />

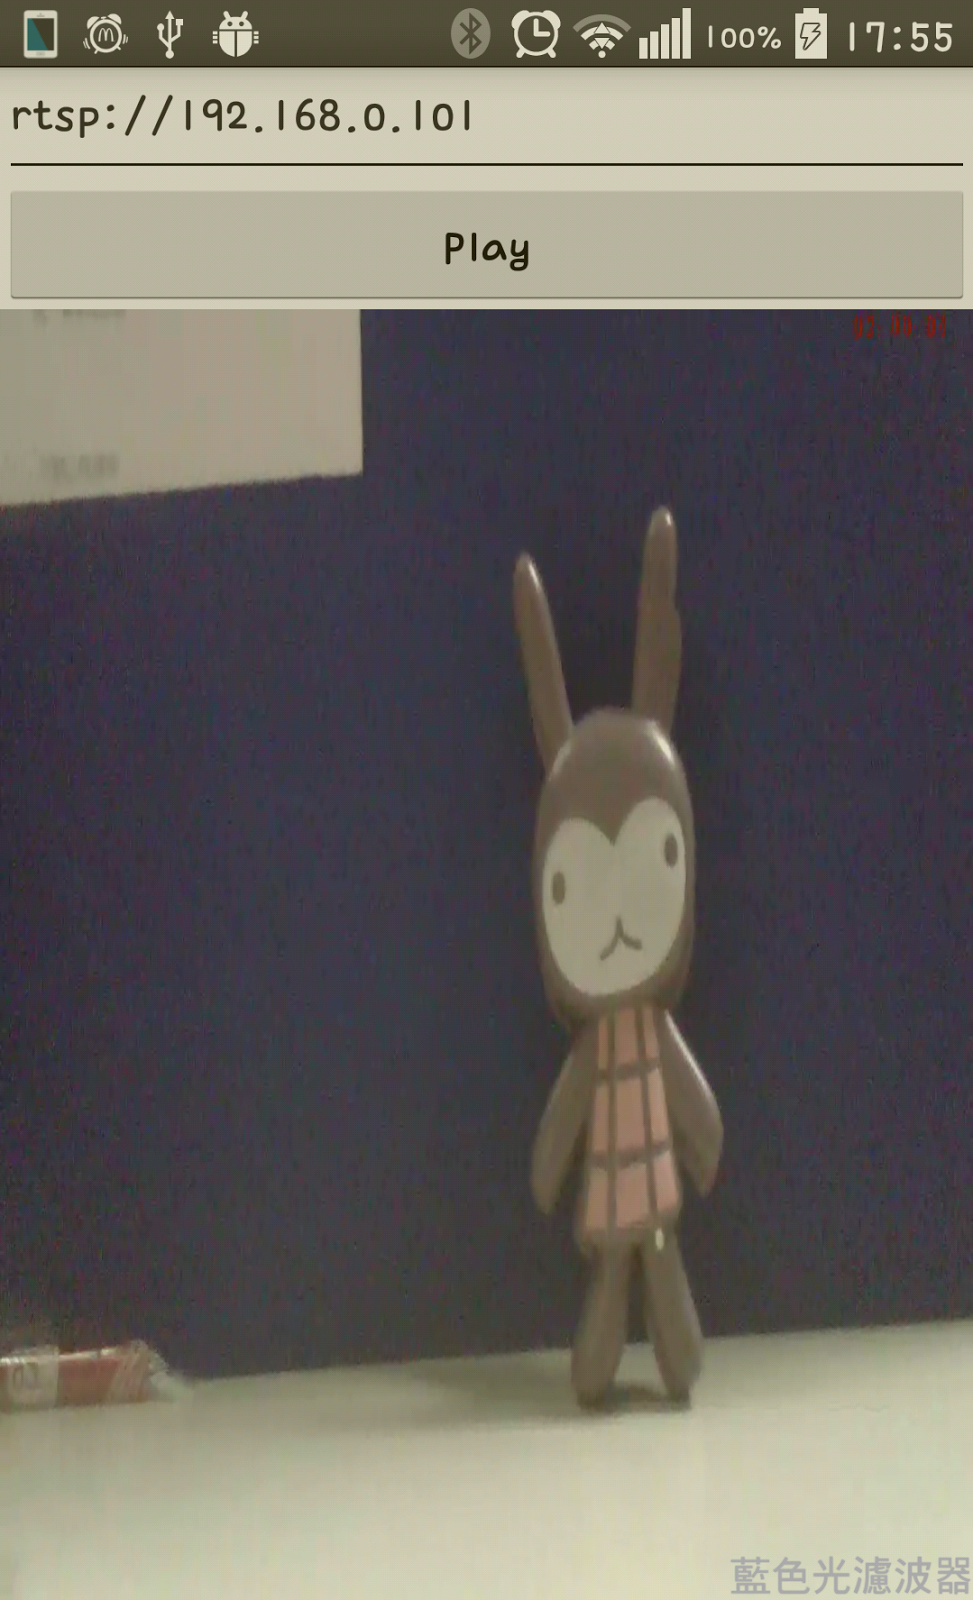
完成圖


歡迎轉載,請註明出處。

2015年3月9日 星期一

Android-Service 藉由 Broadcast 將變數傳至 Activity

之前有講到如何執行Service服務
但是您在背景的東西要怎麼丟到前台?
好比如你請郵差幫你寄信,卻沒寫地址!
那不是無功而返嗎?

這次利用Service內去註冊廣播的服務,請Activity接收訊息。
Activity(Button)
Activity(StartService)
Service(While Loop - Broadcast)
Activity( BroadcastReceiver )

MainActivity.java
package com.example.service;

import android.app.Activity;
import android.content.BroadcastReceiver;
import android.content.Context;
import android.content.Intent;
import android.content.IntentFilter;
import android.os.Bundle;
import android.util.Log;
import android.view.View;
import android.view.View.OnClickListener;
import android.widget.Button;
import android.widget.TextView;

public class MainActivity extends Activity implements OnClickListener{

    private Button startBtn;
    private Button stoptBtn;
    private TextView numText;
    private MyReceiver receiver;

    @Override
    protected void onCreate(Bundle savedInstanceState) {
        super.onCreate(savedInstanceState);
        setContentView(R.layout.activity_main);

        startBtn = (Button) findViewById(R.id.button1);
        stoptBtn = (Button) findViewById(R.id.button2);
        numText = (TextView) findViewById(R.id.textView1);

        startBtn.setOnClickListener(this);
        stoptBtn.setOnClickListener(this);

        // 註冊接收器
        receiver=new MyReceiver();
        IntentFilter filter=new IntentFilter();
        filter.addAction("android.intent.action.test");
        this.registerReceiver(receiver,filter);

    }

    @Override
    protected void onDestroy() {
        super.onDestroy();
        // 結束背景服務
        Intent stopIntent = new Intent(this, Swe.class);
        stopService(stopIntent);
        // 註銷接收廣播服務
        this.unregisterReceiver(receiver);
    }

    @Override
    public void onClick(View view) {

        switch(view.getId()){

        case R.id.button1:

            Intent intent  = new Intent(this,Swe.class);
            startService(intent);
            break;

        case R.id.button2:

            Intent stopIntent = new Intent(this, Swe.class);
            stopService(stopIntent);
            break;

        }
    }

    public class MyReceiver extends BroadcastReceiver {
        
        @Override
        public void onReceive(Context context, Intent intent) {
            Bundle bundle=intent.getExtras();
            String a=bundle.getString("Swe_sum");
            Log.d("ServiceProject","MainActivity Receiver : "+a);
            numText.setText(a);

        }
    }
}


Swe.java
package com.example.service;

import android.app.Service;
import android.content.Intent;
import android.os.IBinder;
import android.util.Log;

public class Swe extends Service{

    private int sum = 0;
    private boolean running = true;

    @Override
    public IBinder onBind(Intent intent) {
        return null;
    }

    @Override
    public void onCreate() {
        super.onCreate();
        Log.d("ServiceProject","onCreate");
        thread.start();

    }

    @Override
    public void onDestroy() {
        super.onDestroy();
        Log.d("ServiceProject","onDestroy");
        running = false;

    }

    Thread thread = new Thread(new Runnable(){

        @Override
        public void run() {
            while(running){
                sum++;
                Log.d("ServiceProject","ServiceSwe : "+sum);
                Intent intent=new Intent();
                intent.putExtra("Swe_sum", ""+sum);
                intent.setAction("android.intent.action.test");
                sendBroadcast(intent);
                try {
                    Thread.sleep(1000);
                } catch (InterruptedException e) {
                    running = false;
                    e.printStackTrace();
                }
            }
        }});

}


記得要註冊 Service 、Receiver
<service android:name="Swe"></service>
<receiver android:name="MainActivity$MyReceiver"></receiver>


歡迎轉載,請註明出處。

2015年3月1日 星期日

Arduino-利用L298N控制馬達

或許大家都有些小疑問
L293D跟L298N最大差別在於?
價格?板子大小?
最主要的差別在於L293D的電流負荷沒L298來的大
所以通常用於微控馬達 ; 若要控制遙控車、自走車則是用L298較恰當

ENA、ENB是用來判斷是否要啟動 A-Bridge、B-Bridge

ENA : 5V
1N1 : 2
1N2 : 3
1N3 : 4
1N4 : 5
ENB : 5V


若要更改轉動方向,請修改電壓高低,不可A-Bridge、B-Bridge都雙高或雙低
以下是示範程式碼 :

int aIn1 = 2;
int aIn2 = 3;
int bIn3 = 4;      
int bIn4 = 5;       

void setup()  
{
  pinMode(aIn1, OUTPUT);
  pinMode(aIn2, OUTPUT);
  pinMode(bIn3, OUTPUT);
  pinMode(bIn4, OUTPUT);    
}

void loop()
{
  
}

void selfTest()
{
  // 兩輪同時向前
  digitalWrite(aIn1, HIGH);
  digitalWrite(aIn2, LOW);
  digitalWrite(bIn3, HIGH);
  digitalWrite(bIn4, LOW);
  delay(500);
  
}


參考資訊 : CooperMaa

歡迎轉載,請註明出處